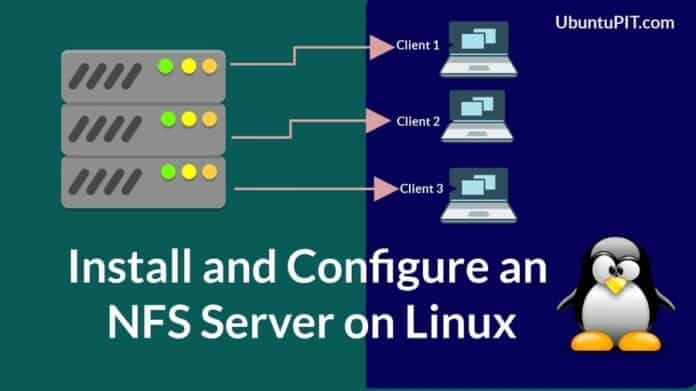
NFS (Network File System) is the method of sharing files over the internet to the clients. If you’re familiar with the FTP (File Transfer Protocol) system, the NFS server will be pretty much easy to understand. Installing and configuring an NFS server on a Linux machine allows users to share public or private files among clients over the Local area network or worldwide. You can also manage whether you want to grand the read-only or the read-write access to your clients.
NFS Server on Linux
NFS server has two basic parts, one is Client end, and another one is host/server end. To install and configure the NFS server, both ends require installing the NFS Kernel for Linux. After the Kernel and total installation process are done, you can assign an IP address, or if you have a DNS protocol, you can also use a Uniform Resource Locator address against your server’s shared IP.
If you’re familiar with the FTP system or Samba, this tutorial will be helpful to you. But be mindful, most of the servers are run on Linux around the world, so learning the NFS server will be a strong start for you to enter into the networking zone. So, fasten your seat belt, in this post we are going to learn how to install and configure the NFS server on Linux for both client and server end.
Step 1: Update Server and Put a Hostname
Before you start installing the NFS Kernel on your Linux, be mindful that you must have a static IP address so that your clients can find and get associated with your server. If you use a dynamic IP address, it would be very much tough for your clients to locate your NFS server. Use the apt update &&; syntax and the hostnamectl commands simultaneously to set your static IP address for the NFS server.
sudo apt update &&
sudo apt upgrade
sudo hostnamectl set-hostname nfs-server.example.com --static
Step 2: Installing the NFS Kernel on Linux
NFS Kernel is the core system of Network File System, and it gives the user the permission to make changes on network protocol and also authorizes the file access permission. To install NFS Kernel on Ubuntu Server, first, you need to use apt update to update your repositories.
Then you’ll be installing the NFS Kernel on your Ubuntu Linux server. But it’s always a smart decision to make sure whether the NFS Kernel is already installed inside your Linux machine or not. To check just run the grep command in your terminal.
$ dpkg -l | grep nfs-kernel-server

To install NFS Kernel on Linux, use the following CLIs’.
$ sudo apt update
$ sudo apt install nfs-kernel-server
 Now to enable the NFS Kernel, run the command line given below in your Linux terminal.
$ sudo systemctl enable --now nfs-server
Step 3: Making Directory for the NFS Server
Once the Kernel of your NFS server is installed inside your Linux machine, now you can step a forward to make a directory which folder you want to share with others. We will be using the mkdir terminal command line to make the directories. After creating the directories we will export files to the NFS directory by using the exportfs command.
$ sudo mkdir -p /mnt/nfsshare
$ sudo chown -R nobody:nogroup /mnt/nfsshare/
$ sudo exportfs -rav
Now you have to authorize the directory so that the client can get access to the directory.
$ sudo chown -R nobody:nogroup /data/nfsshare/
$ sudo chmod 777 /data/nfsshare/
Step 4: Mounting the NFS Server Directory for Clients
When it is all about an NFS server on Linux, there will definitely be at least one feeding end to serve and one or more ends to receive the service, which called the client. At this stage, we are going to mount the shared file directory from the server to the client end. We can use the ifconfig terminal command to find out the specific IP address of the client. We can choose one or multiple users. Let the IP address of the client is 192.168.1.102
$ ifconfig
$ sudo mount 192.168.1.102:/mnt/nfsshare /mnt/nfsclientshare
You can also use these command lines for the mounting directory in the client end. You can also choose the read-only or both read-write access to your client by using the re syntax or the rw syntax. To maintain a synchronous directory, use the sync syntax and, at last, use the no_subtree_check syntax to avoid checking the subfolders inside the shared directory.
For a single client user:
/mnt/nfsshare IP1 (rw,sync,no_subtree_check)
For multiple client user:
/mnt/nfsshare IP1 (rw,sync,no_subtree_check)
/mnt/nfsshare IP2 (rw,sync,no_subtree_check)
Step 5: Exporting Files in the NFS Server Directory
After installing the NFS Kernel on your Linux, and giving read-only or read-write file access to your client, now it’s time to export some files inside your shared directory. To export files, you can use the following terminal commands in your Linux machine. And after exporting files, don’t forget to restart your NFS Kernel to reload the server caches.
$ sudo exportfs -a
$ sudo systemctl restart nfs-kernel-server
Step 6: Approving the Firewall Security to the NFS Server
After doing all this stuff, if you find that your client still can’t get access to your Linux NFS server, probably you forget the firewall security on your Linux. Now it’s time to do the last part of setting up your server. To get the firewall access for your NFS server, use the following terminal command lines. And also, don’t forget to restart the firewall system form your NFS server end. If you want to assign any specific port against the IP address, simply add the port with a slash. For the firewall, we are using the ufw syntax.
$ sudo ufw allow from 192.1.102.0/
$ sudo ufw enable
$ sudo ufw status
Step 7: Setting up the NFS Server for the Clients
To get access to the distributed directory that has been shared from the NFS server end, the client must also have to get associated with the Linux NFS common. Use the following terminal command lines to set up your Linux NFS server-client system.
$ sudo apt update
$ sudo apt install nfs-common
Step 8: Setting Up an NFS Mount Point for Clients
Setting up an NFS mount point on Linux is the last step of configuring the NFS server on Linux. Here, we will be creating a directory using the mkdir terminal command in the client environment where the shared files can be stored. After creating the client folder, we can check the client IP address for cross-checking using the ifconfig command.
$ sudo mkdir -p /mnt/nfs_clientshare
$ ifconfig
$ sudo mount 192.168.1.102:/mnt/nfs_share /mnt/nfs_clientshare
Step 9: Checking Up the NFS Server
Here we go! Our NFS server is ready to be performed on our Linux system. To check whether the NFS server works properly or not, we can send some dummy files from the host server to the shared directory using the mnt command. Then we will get access to the files from the client end. The touch command is very useful to create dummy files.
$ cd /mnt/nfsshare/
$ touch dummyfile.txt
To check from the client end, we will use the mnt list command associated with the client share directory.
$ ls -l /mnt/nfs_clientshare/
Installing NFS Server on Red Hat Linux
Installing the NFS server on Red Hat Linux is a bit different than the Debian’s. That’s why I’m going to write a totally new paragraph for Red Hat Linux users, but the primary procedures are almost the same as previously. You need to install the NFS Kernel on your Red Hat Linux. To do that, please follow the instructions and terminal command lines from your Red Hat Enterprise Linux.
$ yum -y install nfs-utils
$ apt-get install nfs-kernel-server
For SUSE Linux distributions:
$ sudo zypper install nfs-client
Now you have to make an NFS root directory and export files inside the directory. Follow these terminal commands to do that.
$ mkdir /nfsroot
$ exportfs -r
On Red Hat Linux, to initiate the NFS server, use the command written below. And to make your NFS server accessible to your clients, run and mount your server use the subsequent terminal command.
$ /etc/init.d/nfs start
$ showmount -e
Now it’s time to install the NFS common packages on your Red Hat Enterprise Linux. To install the NFS common, run this command from your Linux terminal.
$sudo yum install nfs-utils
Bonus Tip
Till now, we have learned how to install and configure the NFS server on Linux. When the question about freedom and open source, the choice is always yours! Whatever server you use, you can use either Apache Web Server or NFS server but, you will need to know some basic and useful server commands to maintain your server; otherwise, your server may crash.
Final Thoughts
File sharing on Linux is very crucial and not critical. In this post, we have tried to explain briefly what an NFS server is and how it works. The entire post is all about how to set up the NFS Kernel as well as the NFS server on various Linux distros and how to set up the client end so that the client gets access to your NFS server.
We hope the post was useful, and the guidelines were clear to understand. If you do maintain an NFS server, of course, you know how important it is to understand the primary functions and working procedure of an NFS server on Linux. So, if you like this post, don’t forget to share this post on your social media and also do comment related to this post in the comment section.


