Redis stands for Remote Dictionary Server, which is an open-source tool for Linux systems. The most common and popular use of Redis is using it as an in-memory database cache system that can make the process of reaching the site faster. For example, if you have a webserver in point A and the database stored in point B, you can use the Redis cache instance service to minimize the data loading time. Redis stores data inside the memory in the key-value method to gain high performance during any server-level operation. Redis offers caching server, storing data in NoSQL format, and real-time server log monitoring. Installing Redis on a Debian/Ubuntu and Fedora-based Linux is easy and straightforward.
Redis on Linux System
Redis is written in the C programming language, and the Redis Labs build it under the BSD 3-clause license. It can handle strings, lists, maps, and other data indexes. Populating data into the Redis engine is not hard; once you get it installed, you will find that the methods are easy and self-explanatory. Redis can handle cache miss and cache hit, cache worker and localhost, docker container, server, cloud vendor, etc. In this post, we will see how to install and use Redis on Linux systems.
Step 1: Install Redis on Fedora and Debian Linux
We will see how to install Redis on Ubuntu and other Debian-based distributions and Fedora Workstation in this step. The below-mentioned methods are tested on Ubuntu 20.04 and Fedora 33 workstations, and you can also use them in other versions.
1. Install Redis on Ubuntu
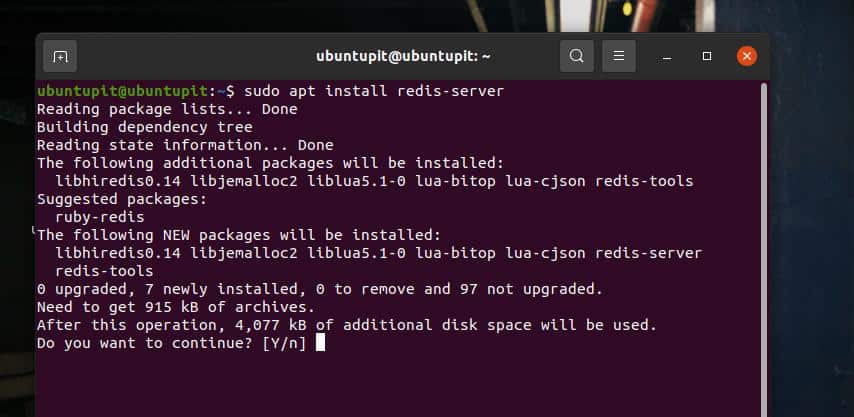
Installing Redis on a Ubuntu or Debian-based system is easy; it is available on the official Linux repository. First, update your system repository, then run the following aptitude command on the terminal shell with root access to install Redis.
sudo apt update
sudo apt install redis-server
2. Install Redis on Fedora Linux
Installing Redis on a Fedora workstation is pretty similar to installing it on Ubuntu; run the following DNF commands on the terminal shell with root access to update your system repository and install the Redis tool.
sudo dnf -y update
sudo dnf -y install redis
When the installation finishes, run the following system control command to enable Redis on your machine.
sudo systemctl enable --now redis
Step 2: Configure Redis on Linux
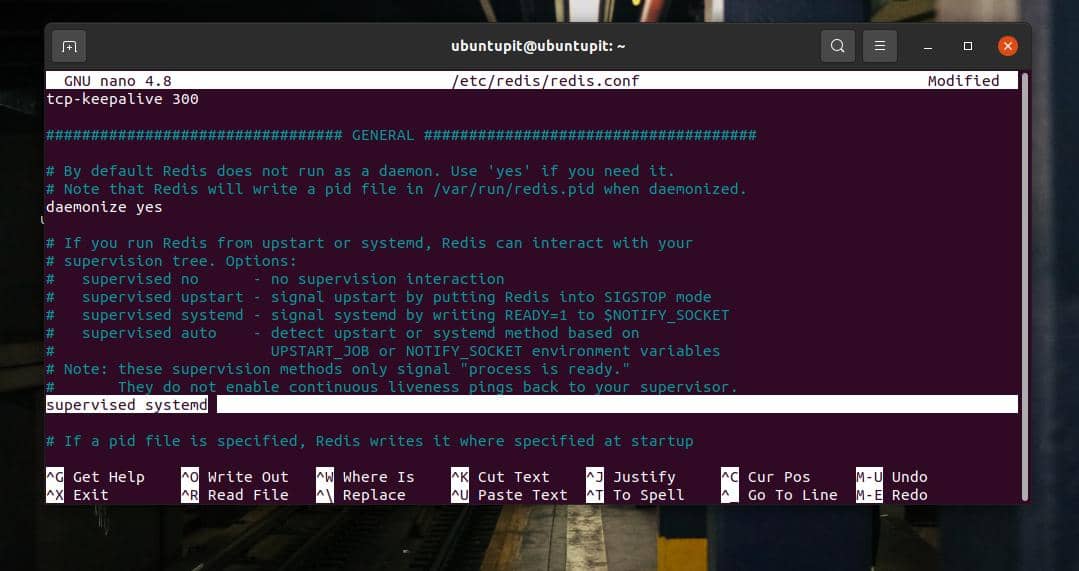
When the installation ends, you can now do a little configuring to make Redis active. First, run the following command on the shell to edit the Redis configuration file. When the script opens, find the syntax supervised, and change the value from no to systemd then save and exit the file. This little change in the script will allow you to run the Redis on your system as a daemon and get more control over the Redis tool.
sudo nano /etc/redis/redis.conf
Then you need to restart the Redis system on your Linx system. Run the following system control command to restart Redis.
sudo systemctl restart redis.service
Step 3: Testing Redis on Linux
After installing and configuring Redis on your Linux machine, you can now test it. Run the following system control command to check the Redis status on your machine. If everything goes right, you would see the PID, tasks numbers, activation status, and other pieces of information of Redis on your terminal screen.
sudo systemctl status redis
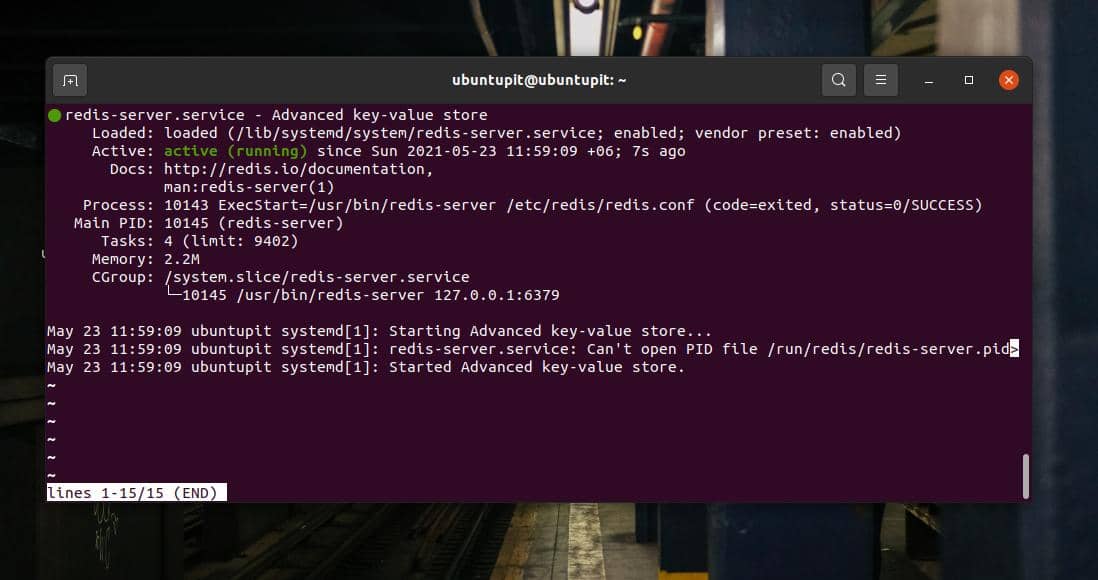
As we enabled the Redis as a system daemon, it will automatically start with the system startup; if you want to stop that, run the following command and start it manually when you need.
sudo systemctl disable redis
To check if Redis works perfectly on your system, run the Redis CLI command and populate it with string data. For example, the following command will load the Redis localhost server engine.
redis-cli
If you run ping on Redis localhost server, it would return ‘Pong’ in return.
ping
Now, run the next command to check if it allows you to set a new string and place it with the key-value ‘test’.
set test "It's working!"

Now, if you run the following command, it would return It's working! on the terminal shell.
get test
Finally, we can check if Redis keeps the stored data even after a system restart. Run the following system control command to restart the Redis engine on your Linux machine.
sudo systemctl restart redis
Then run the prior ‘get test’ command to check if it pulls the same string in return.
get test
In the end, to exit Redis, just type exit in the shell.
exit
Step 4: Configure with Localhost
As you’ve already seen, the default configuration uses the localhost (127.0.0.1) address to access Redis. But if you’ve installed Redis on your Linux machine using any other methods, the chance is that you might have enabled your Redis access from other public IP locations as well. To stop that, run the following command on your terminal shell to edit the Redis configuration script.
sudo nano /etc/redis/redis.conf
When the script opens, find out the binding line and make it uncomment by removing the hash (#) before the line.
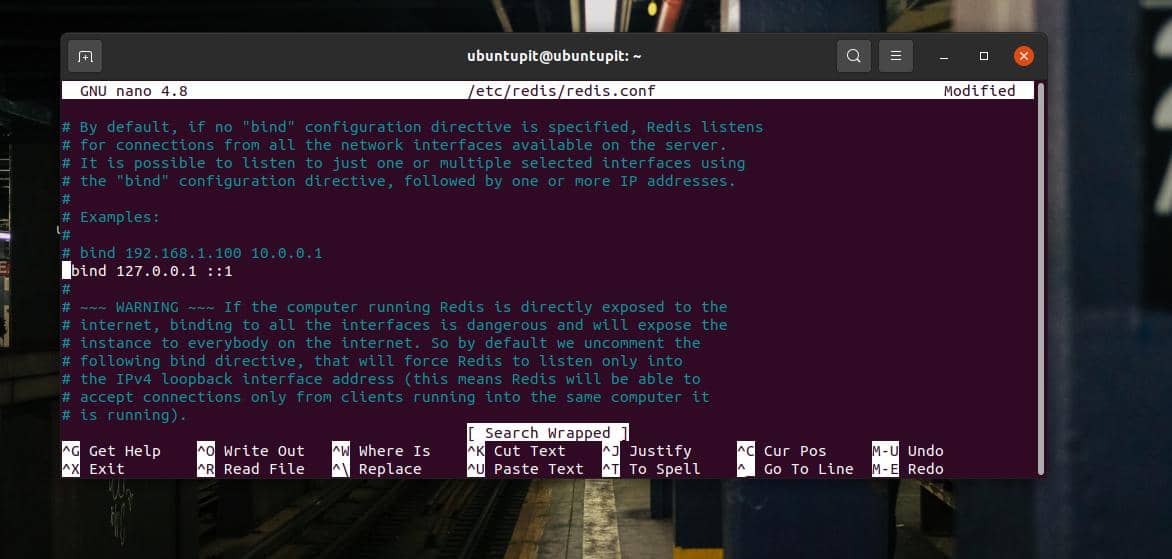
bind 127.0.0.1 ::1
If you’re using a Fedora workstation, you might need to run the following command for binding to localhost.
sudo vim /etc/redis.conf
Now, find the following line and make it uncomment.
bind 0.0.0.0
When the localhost binding finishes, run the following GREP command to check which IP addresses are allowed to access your Redis engine.

If you find anything but your current IP address and localhost address, you might need to do the configurations again in the right way.
Step 5: Set a Password for Redis Server
To prevent your Redis server from accessible from other machines, you can set a password for the Redis CLI. For example, run the following command with root access to edit the Redis configuration script.
sudo nano /etc/redis/redis.conf
When the script opens, find the syntax requirepass and make it uncomment by removing the hash (#). Then replace the word foobared with your desired password.
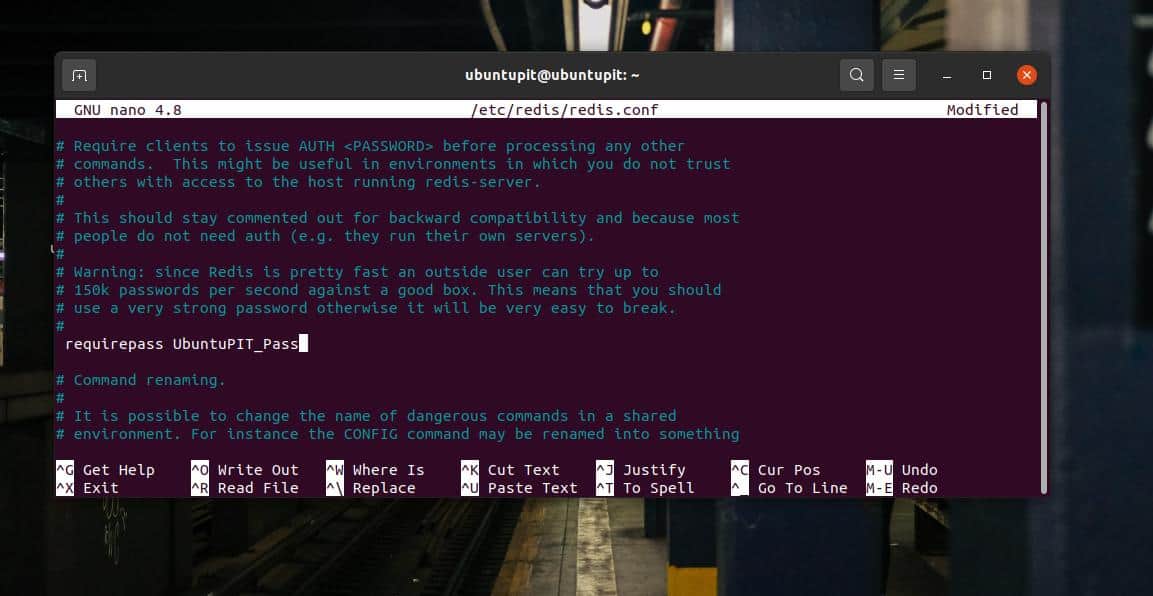
# requirepass foobared
When the password is set, run the following system control command to reload the Redis settings, the next time you want to access the Redis CLI, it will require the password.
sudo systemctl restart redis.service
Final Words
Using Redis is safe and secure; it doesn’t manipulate your data. However, if you’re trying to use Redis to improve your local machine’s performance, you can try using the Memcached tool, an in-built tool for caching memory. In this post, we have seen how to install and get started with Redis in the Linux system.
I hope this post has been informative for you; please share this post with your friends and the Linux community. You can also write down your opinions in the comment section regarding this post.


