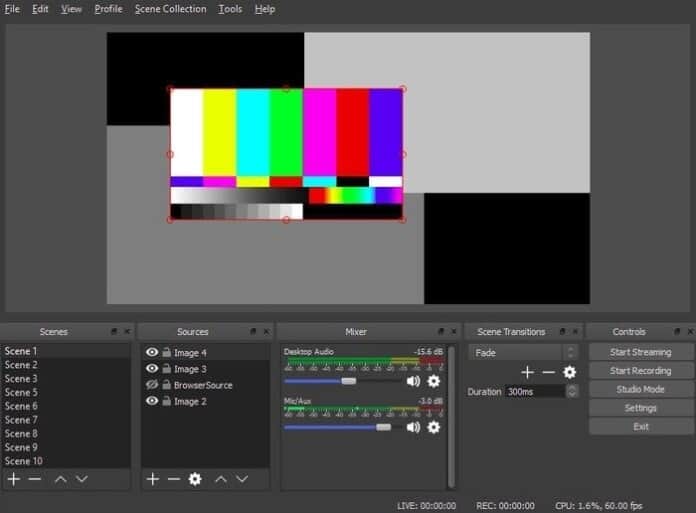
Open Broadcaster Studio (also known as OBS Screen Recorder) is a free and open source streaming software that can be used to make interactive videos for streaming via Facebook, YouTube, and other social media networks. OBS Screen Recorder is one of the featured rich and advanced screencasting programs for Linux. This streaming software lets you do real-time source and device capture, recording and broadcasting, encoding, and scene composition. OBS – Free Live Streaming Software is a cross-platform application that runs smoothly on Windows, Linux, and macOS.
Features – OBS Screen Recorder
- Real-Time audio and video capturing with high performance.
- Supports multiple sources like webcam, text, images, window screen, etc.
- You can set up an unlimited number of scenes.
- Easy and intuitive audio mixing with various source filters likes noise suppression and gain, noise gate, etc.
- It offers a set of powerful tools and easy to use for everyone.
- A wide array of configuration options and tweaks for recording or broadcasting.
- Supports custom hotkeys.
- Live RTMP streaming to various social media like Facebook, YouTube, Twitch, etc.
- GPU based game recording and broadcasting with high performance.
Install OBS – Open Broadcaster Studio
There are many ways to install OBS in Ubuntu and other Ubuntu derivatives. Here I will touch upon all the ways to install open broadcaster studio on Ubuntu Linux. In case you don’t know how to install software using Ubuntu PPA, Snap package, Flatpak, etc., check out my previous tutorial on How To Install Software in Ubuntu.
1. Install OBS via Ubuntu PPA
OBS provides official Ubuntu PPA, which contains the latest software version for all the current Ubuntu Linux.
Ubuntu 14.04 LTS and older
Note: If you are still running Ubuntu 14.04 LTS or older, which doesn’t include FFmpeg officially. First, you need to install it by running the following command into the Terminal (Ctrl+Alt+T or searching for “Terminal” from the app launcher).
sudo add-apt-repository ppa:kirillshkrogalev/ffmpeg-next
sudo apt-get update
sudo apt-get install ffmpeg
sudo add-apt-repository ppa:obsproject/obs-studio
sudo apt-get update
sudo apt-get install obs-studio
Ubuntu 15.04 and Following Versions
FFmpeg is officially included; just run the below command one by one into the Terminal:
sudo apt-get install ffmpeg
sudo add-apt-repository ppa:obsproject/obs-studio
sudo apt-get update
sudo apt-get install obs-studio
Ubuntu Latest Versions
You just need to add the official PPA and install the free live streaming software – OBS. Follow the below commands:
sudo add-apt-repository ppa:obsproject/obs-studio
sudo apt-get update
sudo apt-get install obs-studio
How to Remove the OBS if installed via Ubuntu PPA
You can use the synaptic package manager or use the following command to remove the OBS from the system:
sudo apt-get remove --autoremove obs-studio
For removing PPA, follow “Software & Updates >> Other Software Tab >> Select and Remove Specific PPA”.

2. Install OBS via Snap in Ubuntu
If you don’t like installing the OBS screen recorder through third-party repositories, the Snap package can be used. This open source streaming software – OBS, is available via a snap package in the Ubuntu software center. If you are using Ubuntu 16.04 or older, check out the detailed instructions on How to use Snap packages in Ubuntu Linux. Otherwise, search the OBS software in Ubuntu software center and install.

Or use the below command into the Terminal:
snap install obs-studio
Run more 2 commands to get access into the webcam and external storage:
sudo snap connect obs-studio:camera
sudo snap connect obs-studio:removable-media
3. Install OBS on various Linux Distros
OBS provides detailed instructions on installing OBS Screen Recorder on various major Linux distributions, including Arch Linux, Manjaro, Fedora, OpenSUSE, etc. Check out the Official Tutorials.
Final Thought
Once you have completed installing the OBS screen recorder, run it from the Gnome Applications drawer. Now starts your own video streaming channel on social media.


Actually using snap is the only way to install obs on Ubuntu