Usually, we store many personal documents and files in our computer that is important for us. We do not want these personal data to be accessed by others. However, we think our password-protected Windows system is good enough to protect our data from unauthorized access. But it is not completely true. Somehow Windows default password can be hacked, and your personal data can be stolen. So it’s the best option to make full disk encryption in Windows 10 to protect your data from being stolen unless providing the correct password.
If you are using Windows 10 Professional, you can easily encrypt your full disk by using BitLocker. Windows 10 other version users need to pay $99 to upgrade Windows version to access BitLocker. So Windows 10 other version users can encrypt their disk by using alternative disk encryption programs. In this article, we provide both methods to encrypt the disk in Windows 10.
How to Enable Full Disk Encryption in Windows 10 using BitLocker
If you are a Windows 10 Professional user, you can secure your personal data using Windows default disk encryption software called BitLocker. Let’s see how to use this software-
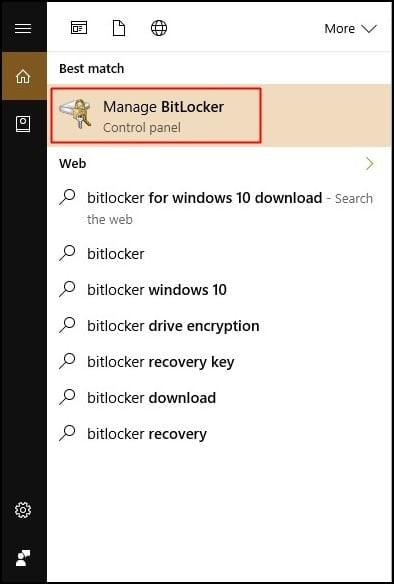
- In the beginning, type BitLocker and press Enter in the Windows search box.

- After opening BitLocker, select the drive that you want to encrypt. Here, we start to encrypt Drive C. You can start to encrypt any other drives. To encrypt the drive, Turn BitLocker on beside the Drive.
- You have two options to encrypt the drive. You can encrypt the drive by using either a password or a smart card. In this tutorial, we encrypt the drive by using a Password. Because it is easy to use. Enter your password on the password field that should contain upper and lower case letters, numbers, spaces, and symbols. And re-enter the same password keywords in the Next field.
- Now choose the way you want to save your password. You may find four different options to save your password. Choose anyone from the option list and click on the Next button.
- The new page comes with to decide which encryption mode to use. Here, you need to select the New Encryption mode radio button and click on the Next button.
Congratulations! Your drive encryption starts now, and it takes some time to finish the encryption process. That’s all. Your drive is now fully encrypted with a password.
Encrypt Drive using Encryption Programs
If you are not Windows 10 Professional user, you can not access the BitLocker program. You may find many alternative full disk encryption programs to encrypt your Windows 10 computer drive. You may find many open source disk encryption programs.
Besides, many disk encryption programs support EFI and GPT system partition encryptions. Some of the free disk encryption lists are- TrueCrypt, VeraCrypt, AxCrypt, AES Crypt, etc. You may use these disk encryption programs for free. However, you need to purchase the premium version to unlock some advanced features.
Among the list, my recommendation is for VeraCrypt. It is an open source program and supports both EFI and GPT system partition encryptions. But you may make sure that you download it from a safe source.
Final Words
So this is the simplest way to enable disk encryption in Windows 10. I hope this article helps you to protect your drive from unauthorized access. You may share your experience of disk encryption in our comment box.
Besides, you can share this Windows tutorial with others so that they can encrypt their drives also. Furthermore, you can let us know which Windows tutorial you want to know. Our expert team guides you of your asking Windows tutorial.