KVM allows you to use multiple OS on your system without having issues. There are options to use virtual machines, VMware, and other integrated systems for using different operating systems on your PC. Still, KVM is one of the most reliable arrangements for virtualization. KVM stands for Kernel-based Virtual Machine, which allows you to switch between mouse, keyboard, monitor, and systems. Some people also consider KVM as an integrated arrangement of Keyboard-Video-Mouse, where the entire system works over an internet (local/broad) connection. KVM has both hardware devices and software systems that you can install/use with your Ubuntu system. If you’re a system administrator, using KVM on your system must give you relief from switching one system to another.
KVM on Ubuntu Linux
On Ubuntu, when you run a third-party hypervisor on your system, it connects the virtual system or the firmware with the system kernel. As the KVM is a kernel-based virtualization system, it works smoothly in Ubuntu. It is written in the C programming language and has the GNU GPL privacy license. It works on both x86 and x64 bit computers. In this post, we will see how to install and get started with the KVM on a Ubuntu/Debian system.
Step 1: Check If Your System Supports Virtualization
In this era of multitasking, system manufacturers understand the need for versatile work. That’s why most modern computer or hardware arrangements support virtualization. To check whether your system supports it or not, you can run the following grep command on your terminal shell to check it. In return, any result that is larger than 0 is a positive sign that your system does support virtualization.
$ egrep -c '(vmx|svm)' /proc/cpuinfo

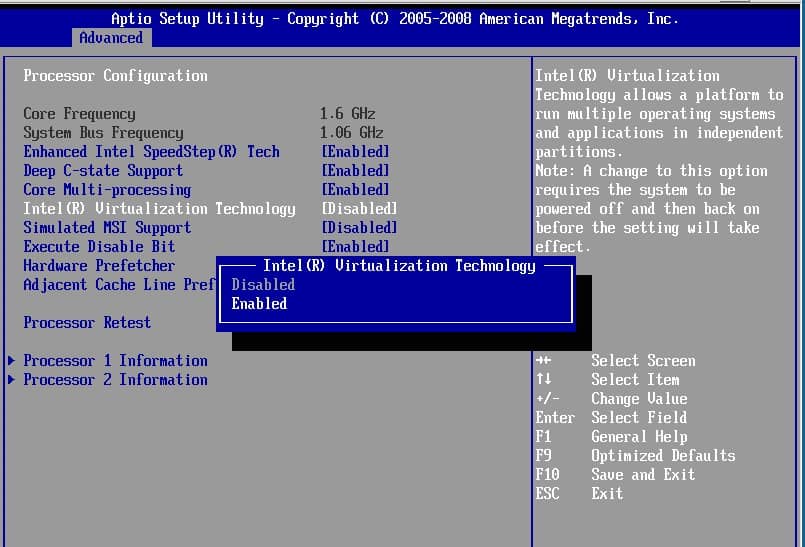
If you can not find the virtualization info on your system, you can look into the BIOS and see if there is an option to enable it.

You may now check whether KVM supports your system or not. First, run the following command line on your terminal shell. If you find a similar return message as shown below in the picture, you are good to go for installing KVM on your machine.
$ sudo kvm-ok

If you find something wrong in the return of the above command, you can run the following command to check your CPU errors.
$ sudo apt install cpu-checker
Step 2: Install KVM on Ubuntu/Debian Distribution
After ensuring your system supports KVM, you can run the following aptitude command on the terminal shell with root access to install the KVM, library functions, and the daemon on your system.
$ sudo apt install -y qemu qemu-kvm libvirt-daemon libvirt-clients bridge-utils virt-manager
The above command includes an emulator, the main KVM package, a daemon, a GUI tool for interacting with the KVM, and other utility tools for the KVM.
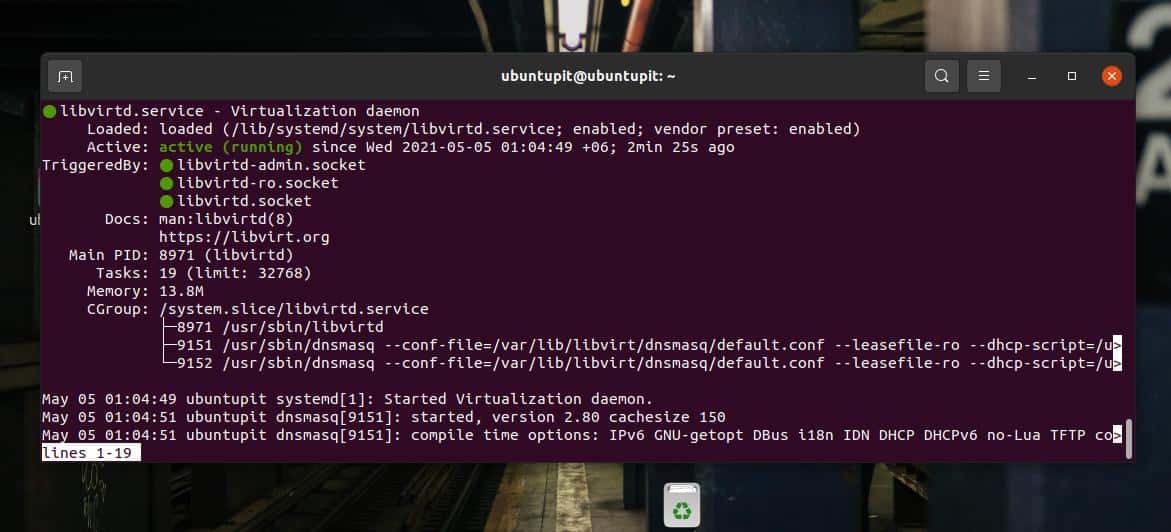
When the installation finishes, you might need to check if it is installed correctly or not. Run the following command on the shell to know the KVM status.
$ sudo systemctl enable --now libvirtd
The system control command will show the PID, memory use, file tree format, and other details of KVM on your Ubuntu machine.

The following GREP command will return with the list of modules that are currently in use.
lsmod | grep -i kvm
If you want to use KVM on a regular basis on your system, you can run the following command on your terminal shell to enable it on boot.
$ sudo systemctl enable --now libvirtd
In addition, if your system has multiple users, you can define a username for the KVM. Run the add user command to add a user to your system.
sudo adduser ubuntuPIT kvm
Finally, run the following command to verify the KVM installation on your Ubuntu system.
virsh list --all
Step 3: Get Started with KVM on Ubuntu Linux
After installing the KVM and creating a user, you can now go ahead and create a virtual machine on your Ubuntu system. There are both GUI and CLI methods for creating virtual machines through KVM. Here we will see both GUI and CLI methods.
1. Create A System via CLI on KVM
On a Ubuntu machine, you can run the virt-install command to download and install operating systems directly on your machine. The following command can be used to download any operating systems available on the KVM’s hypervisor repository.
sudo virt-install --name=fedora33 \
In the command line, you will see the OS name, required memory size, the required number of virtual CPUs, disk required info and other pieces of information. If you find everything right, please put your root password to proceed.
2. Create A System via GUI on KVM
The graphical user interface method is more simple than the CLI to install a virtual system via KVM on Ubuntu. In the starting, you might need to run the following command on the shell to open the KVM environment.
sudo virt-manager
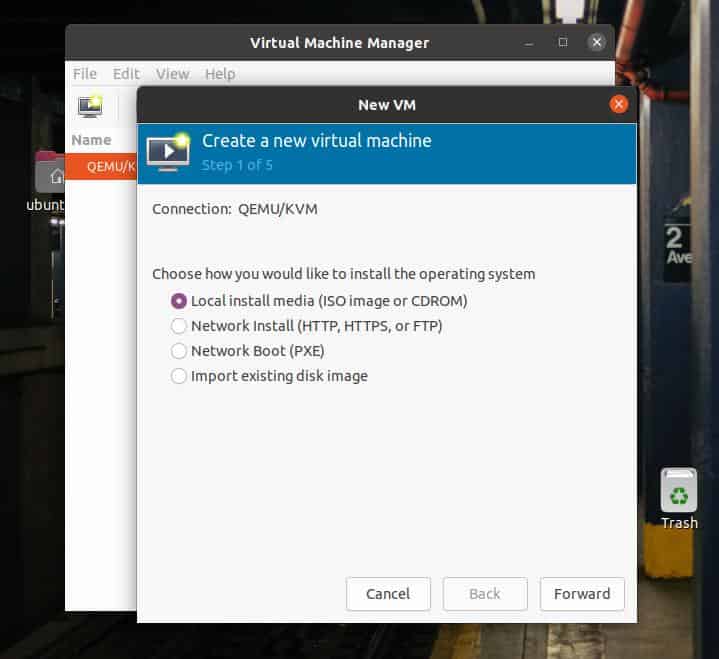
When the tool opens, click on the File button to add a new ISO file for creating a new system. Then, from the file location list, select the ‘Local install media’ method to load the ISO file.

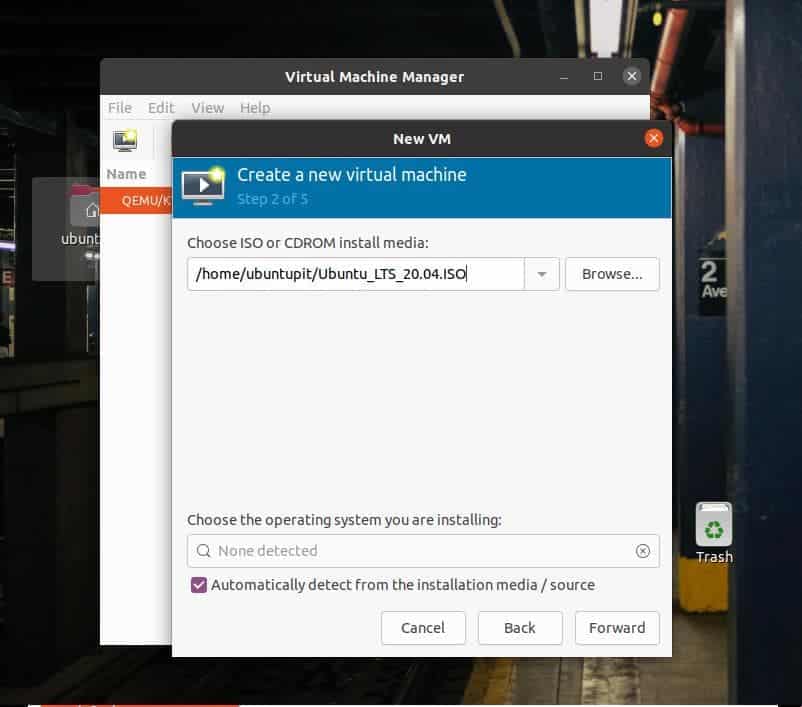
Now, select the ISO file from your filesystem and click on the Forward button to proceed. You can also select the ‘Automatically detect from the installation media’ to detect the type of your ISO file. Now, on the next step, select the RAM. and CPU core numbers and disk space to move forward.

Now, click on the Forward button, which will lead you to the next step. The next steps are easy and self-explanatory; please complete the steps and click on the Finish button to exit the installation wizard.
Ending Word
Installing the KVM on a Ubuntu machine is not a hard task. Installing it on your machine can help you at managing multiple systems. In the entire post, I’ve described how you can enable virtualization and install KVM on a Debian/Ubuntu machine. Unfortunately, it has been seen that some of the AMD chipsets don’t support CPU virtualization; please check your hardware compatibility before you start installing KVM.
Please share this post with your friends and the Linux community if you find this post useful and informative. You can also write down your opinions regarding this post in the comment section.

Worked so far in the middle of install on Linux Mint 20-04.3
Thanks….
What I am really looking for is best practice for the nextcloud server on my local Linux network. Thanks again and have a great day.
thank you
worked first try
LXD which native to Ubuntu to manage/orchestrate LXC containers added VM support via Qemu. You can use LXD now for both container & VMs (Windows & Linux).