On October 5, Windows 11 finally has been launched with a bunch of new features. One of the fascinating features of Windows 11 is the native Andriod emulation. So you can now play Andriod apps on your Windows without installing third-party apps. Though the feature is still a beta version in the Windows Insider Program, you can install Google Play Store on Windows 11 by following multiple methods.
However, you can download Andriod apps from Amazon App Store, embedded with Microsoft Store. The Amazon App store only contains apps compared to too little than the google play store. So if you want to access the entire Google Play Store library on your Windows 11, you should follow the guidelines described in this article. This guide will explain the most effective way to install Google Play Store on your computer. Let’s get into it below.
How to Install Google Play Store on Windows 11
There are several ways to get Google Play Store on Windows 11. But most of the cases you make confirm your computer is configured for installing the Google Play Store, all necessary files are installed in your computer, and your system is ready to go forward.
This guide will show the easiest way to modify Windows Subsystem for Andriod so that you can run Google Play Store on Windows 11. The method has been described by software developer ADeltaX, who released a detailed video about Windows Subsystem modification and simplified the technique by following Yujinchang08 on Github.
However, it is warned that modifying the Windows Subsystem for Android risks data loss from your hard drive. So before changing the Windows Subsystem, you should consider its risk and back up your system.
1. Uninstall Windows Subsystem and Enable Developer Mode
- First, go to the Windows 11 settings app from the Start icon and click on the App menu from the left panel.
- Now click on the Apps & features from the App section tab.
- Then, scroll down the list and find the Windows Subsystem for Android option from the list. Click on the three dots besides Windows Subsystem for Android and click on uninstall in the contextual menu.
- In this step, click on the Privacy & security tab from the left panel of the Apps & features window.
- In the Privacy & security section, you will find the Developer mode. Turn on the Developer mode.
- A Pop-up message will appear to confirm your command. Click Yes to confirm the changes.
2. How to Download Windows Subsystem for Android package from Github
- First of all, go to Github and sign up for an account if you do not have an account in Github.
- Input verification code from your email address to verify the Github account.
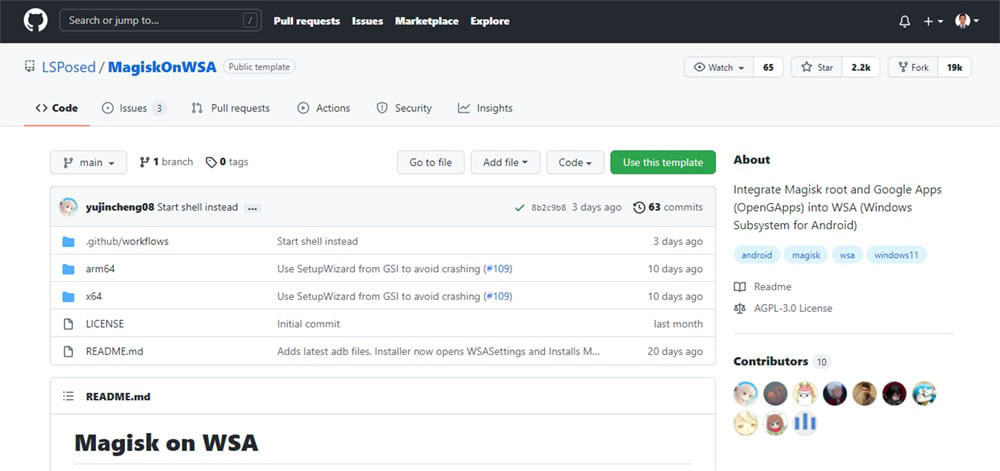
- Now search on Github by “LSPosed/MagiskOnWSA” and click on the first search result or directly head over to the LSPosed MagiskOnWSA page on Github.
- Then click on the Fork button on the top right corner. It will take a few seconds to copy the opened Fork in your account. If you do not find it, go to your profile page and click on your repositories, where you find your forced items.
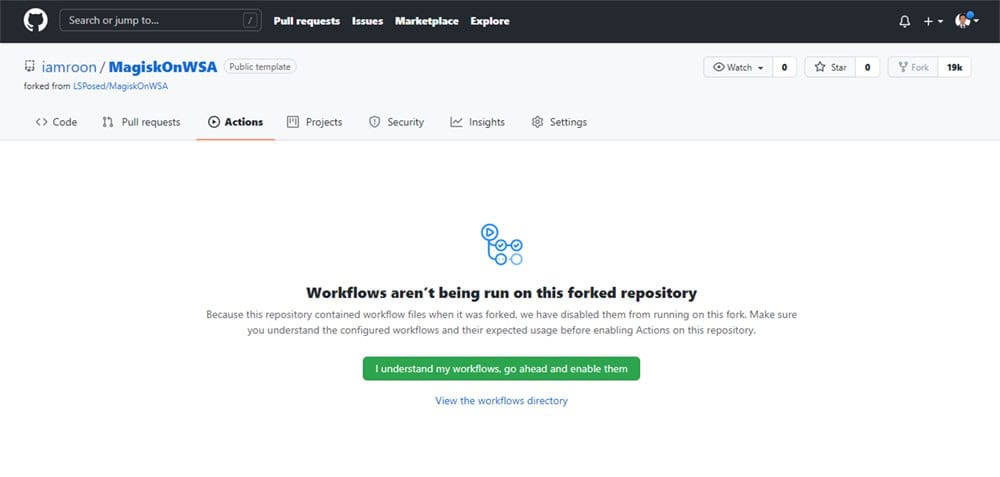
- When the Fork is in your account, click on the Actions tab. In the Action tab, you need to provide permission to run this workflow by clicking on the green button, which says I understand my workflows, go ahead and enable them.
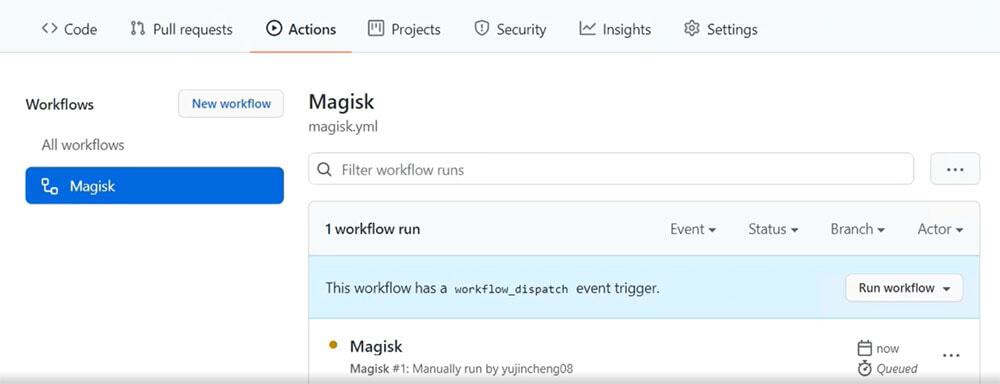
- Click on the Magisk workflow from the left panel and click on the Run workflow button.
- Then Magisk APK link is generated on the pop-up page. You type pico in the search box from GApps variants in the following box and click on the green Run workflow button.
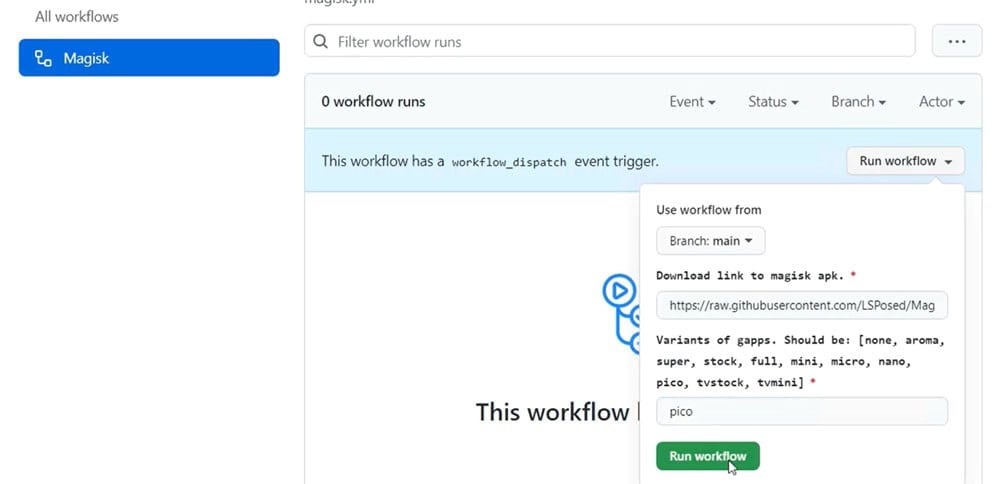
- Once the process is completed, the marker turns into a green tick.
- Click on the Magisk task label and scroll down to the Artifacts tab in the middle of the page. In this tab, you will find two WSA packages ready to download; one is arm64, and the other is x64. Choose your package based on your computer requirement and download the package.
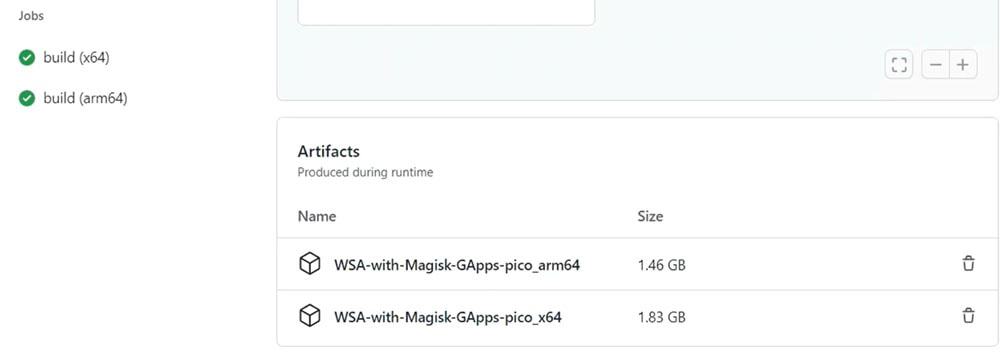
- It takes a few minutes to download the package. However, the download package is smaller than the listed size, and you need to extract the download file.
3. How to Set up Windows Subsystem for Android package
- Open the downloaded folder and find the Install file from the folder. Firstly, please right-click on the Install file, and secondly, run it with PowerShell. A warning pop-up message will display; you confirm it and click on the Run if PowerShell asks your permission to continue.
- The installation process is completed in a few minutes. After completing the installation process, go to the Windows 11 start menu to search for the Windows Subsystem for Android and click on the top result to launch the app.
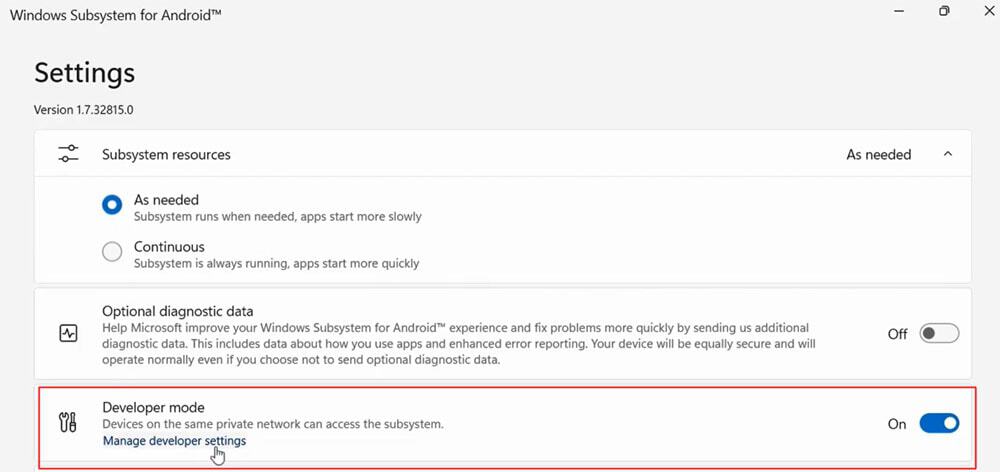
- Turn on the Developer menu in the Windows Subsystem for Andriod and click on the Manage developer settings to turn on the Windows Subsystem for Andriod virtual machine.
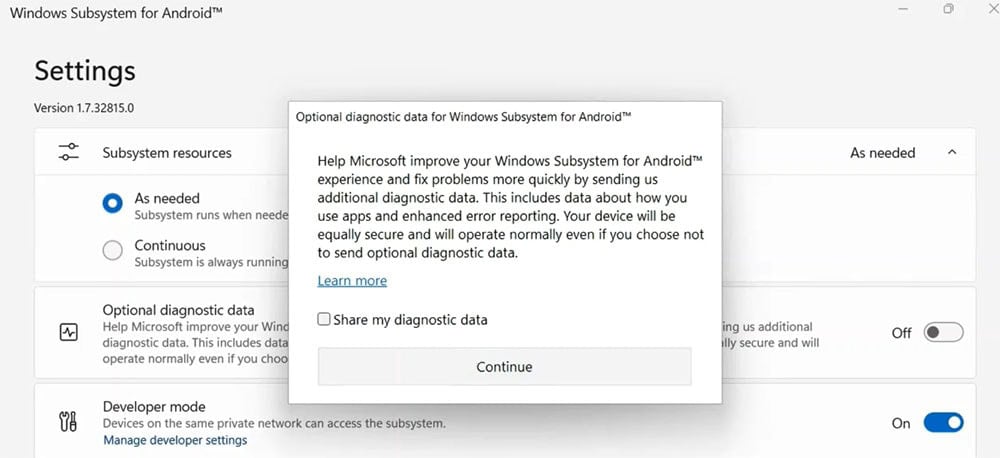
- A pop-up will display to continue optional diagnostic data. Here uncheck the Share my diagnostic data option and click on the Continue button.
- Now go back to the Download installation folder > platform-tools and right-click on the mouse. From the contextual menu, click on the Open in Windows Terminal option.
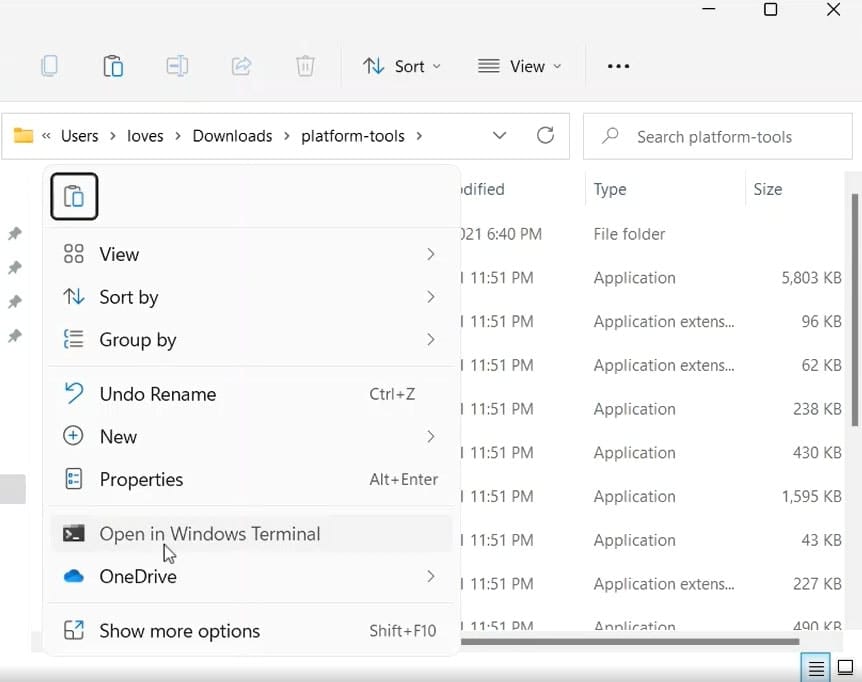
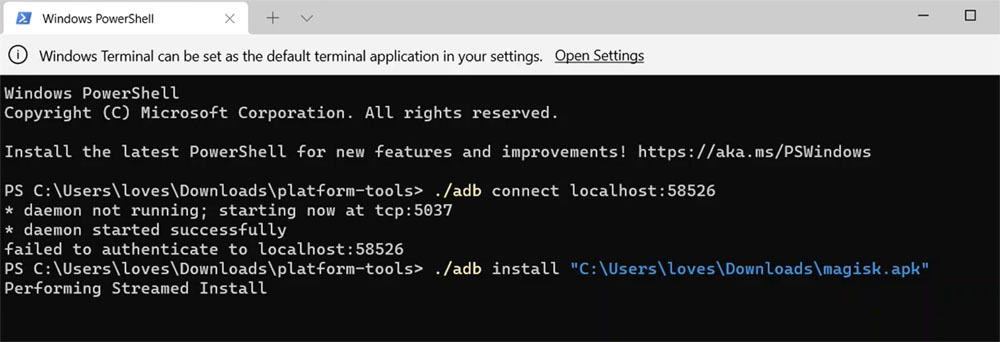
- Then Windows PowerShell runs. In the Windows PowerShell, type the code
./adb connect localhost:58526and press Enter. Again, type./adb installand paste your magisk.apk file location. Then press Enter on your keyboard and wait a few seconds to complete the installation process.
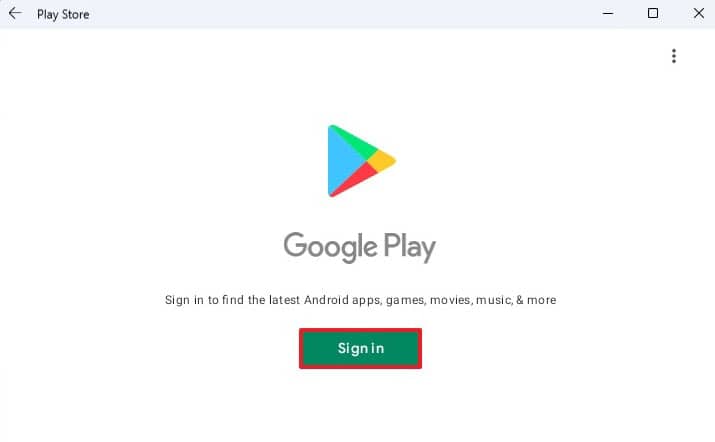
- Now type Play Store on the Start menu search box and click on the top result to open it.
- Click on the Sign-in button, and you can sign in with your Google account credential. Then, click on the check box to agree on terms and conditions to complete the google account sign-in process.
- After completing the sign-in process, you can download and install the Android apps from the Google play store.
Install Android Apps from Google Play Store in Windows 11
Once Google Play Store is completely set up in Windows 11, you can download any Andriod apps from Play Store and run these on Windows 11. Let’s see how to download and install Andriod Apps in Windows 11.
- Go to the Start menu in Windows 11 taskbar and search Play store on the search box.
- After that, click on the top result to launch Google Play Store in Windows 11.
- Now search for an app—for example, type “Gmail” to install the Gmail app on your computer.
- When the app page appears on your computer, click on the green Install button.
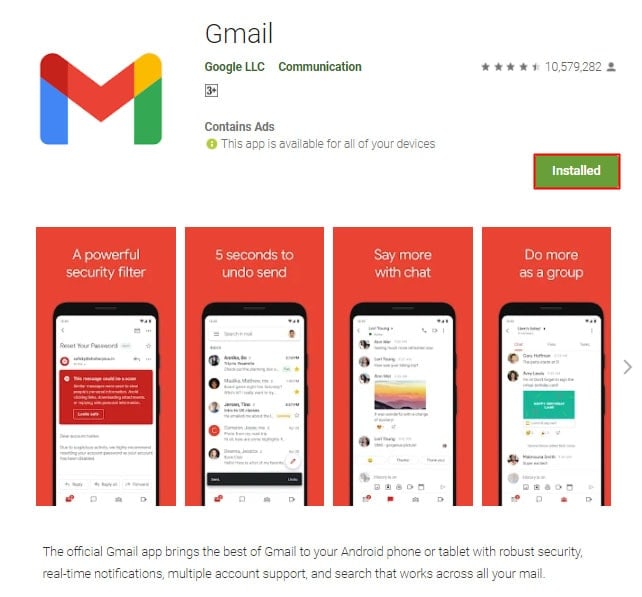
- Click on the Continue button and click on the Skip button on the next page.
- Now, your app is ready to open. Click on the Open button.
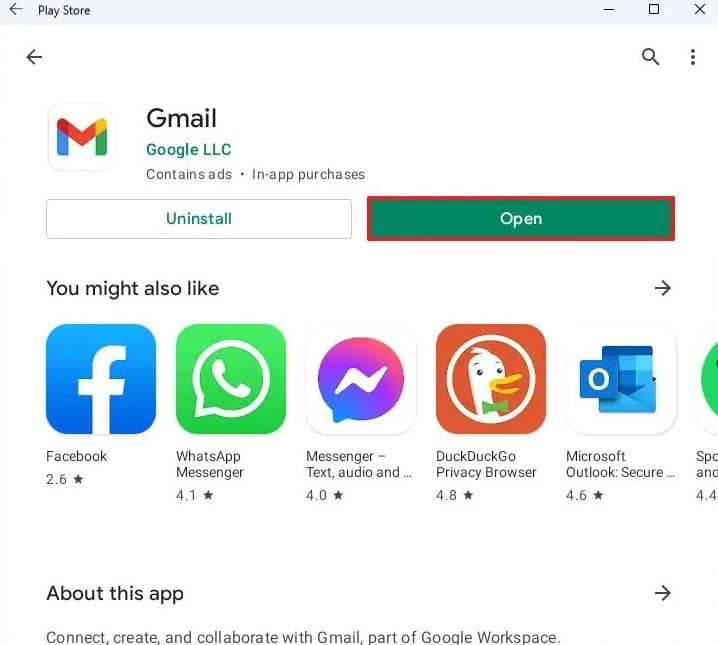
- Continue the setup process and run the app on your Windows.
You can virtually download and run any Android app on your Windows 11 computer by following the same process.
To Wrap up
The installation of the Google Play Store in Windows 11 is still in the developing stage. However, you can install it by modifying of Windows Subsystem for Android. If you search on the internet to learn how to modify Windows Subsystem for Android, you find a lot of methods, but all methods are not convenient for all.
So in this guide, I pick the simplest way to modify Windows Subsystem for Android. I follow the method described by ADeltaX and the Magisk WSA script on Github provided by Yujinchang08.
I have explained step-by-step instructions to modify Windows Subsystem for Android and install Google Play Store. So, I hope you can easily set up Google Play Store in Windows 11 by following this guide.
However, if you face difficulties by accomplishing the guide, you can write your problem in this article comment box. Our technical team will review your comment and reply to you. On the other hand, if you can successfully install the Google Play Store in your Windows 11, share your experience in this article comment box. Lastly, please share this article with your friends to run Andriod apps in their Windows 11.
