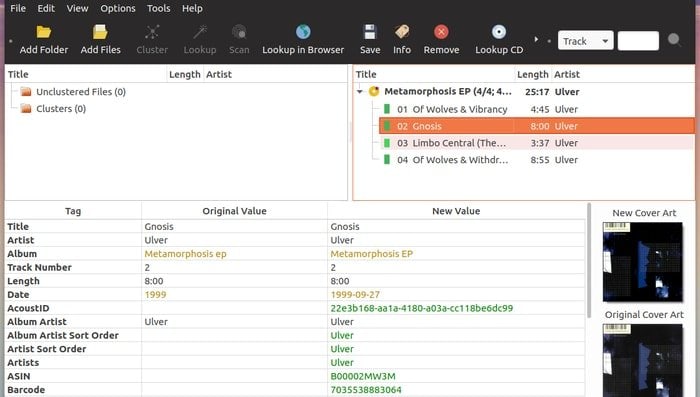
MusicBrainz Picard is a free, open source and cross-platform modern music tagging software for Linux, Windows, and MacOS. This music tagger application helps to identify, organize and tag digital audio files using vast music tagging information database of its own which is curated by the volunteers.
It let you organize your local music by automatically inserting and updating track information, album, album art cover, artist, etc. In this case, if Picard database does not find meta information of any specific audio file, then it uses AcoustID – a database for audio fingerprints to get tagging information for that audio recording.

MusicBrainz Picard supports all the modern music formats including FLAC, MP3, OGG, WMA, M4A, WAV, and more. It also can read a compact disc for comparing metadata information. Moreover, if you require any specific task to be done, then there are some plugins available to help you out. This software is written in Python programming language.
New features in Picard 2.0.1
MusicBrainz Picard has recently released a new version with some significant changes and bug fixes. Let have a close look at it:
Bug fixes
- Fingerprinting not working on macOS in Picard 2.0
- Error creating SSL context on Windows
Improvement
- Improve slow startup times by moving to a non-single file exe
- Use an installer for Picard 2.x windows exe
See the full changelog here.
How to Install MusicBrainz Picard in Ubuntu
There are few ways you can follow to install this music tagging software in Ubuntu. Here in this quick tutorial, I will show you all the possible ways to install.
Method 1: Using Official PPA
MusicBrainz Picard provides an official PPA consisting of all the dependencies. Open the Terminal (Ctrl+Alt+T) and run the following command:
sudo add-apt-repository ppa:musicbrainz-developers/stable
If any previous version installed, then run the software update or else run the following command:
sudo apt-get update
sudo apt-get install picard
How to Remove
To remove the MusicBrainz Picard from the system, run the below command:
sudo apt-get remove --autoremove picard
To remove the PPA, Follow “Software & Updates >> Other Software tabs.”
Method 2: Using Source Code
Install any software using source code is complicated for the newbie, but still you have a choice to use it. In case you don’t know how to use the source code in Linux, follow my tutorial.
Is this tutorial helpful? Let me know your experiences and suggestions in the comment below.
